Installing boot9strap (MSET9 CLI iOS)
Technical Details (optional)
MSET9 is an exploit for the System Settings application developed by zoogie. It exploits a flaw where the ID1 (the second 32-character folder name inside of the Nintendo 3DS folder, inside of the ID0) can be any name as long as it is 32 characters. Performing a specific sequence of actions results in the console executing the instructions that are encoded into the ID1 folder name, which can be used to grant full control over the 3DS.
Compatibility Notes
WARNING
This page requires iPhone or iPad with iOS/iPadOS 14.0 or higher. Update your iPhone or iPad first if it's on older system. If you have a computer running Windows, macOS, or Linux, follow Installing boot9strap (MSET9 CLI) instead. If you have an Android phone/tablet or a Chromebook, follow Installing boot9strap (MSET9 Play Store) instead. If you do not have access to any of these devices, you will need to use an alternate exploit.
What You Need
- iSH from App Store
Instructions
INFO
On this page, you will use the MSET9 script, which is used to trigger MSET9. While the script is in progress, user data will temporarily disappear but will return upon the completion of this page. If you get an error when running the script, the solution to that error can most likely be found on the troubleshooting page.
Section I - Prep Work
In this section, you will prepare the MSET9 exploit by temporarily creating a new HOME Menu profile with no user data, and then setting up that profile with only the minimum data required for MSET9 to trigger. Your existing user data will disappear, but will come back when you are finished with this page.
Insert your SD card into your iPhone/iPad
Copy the following command:
wget -O - https://imset9.686178.xyz | sh- Tap on the block first, then copy button will show up for copying easily
Open the iSH application
Paste the command copied previously by tapping the paste button at the top right corner of your keyboard, then hit return to run the command
Pick your SD card in the Files popup, then hit "Open" at the top right corner of the popup
INFO
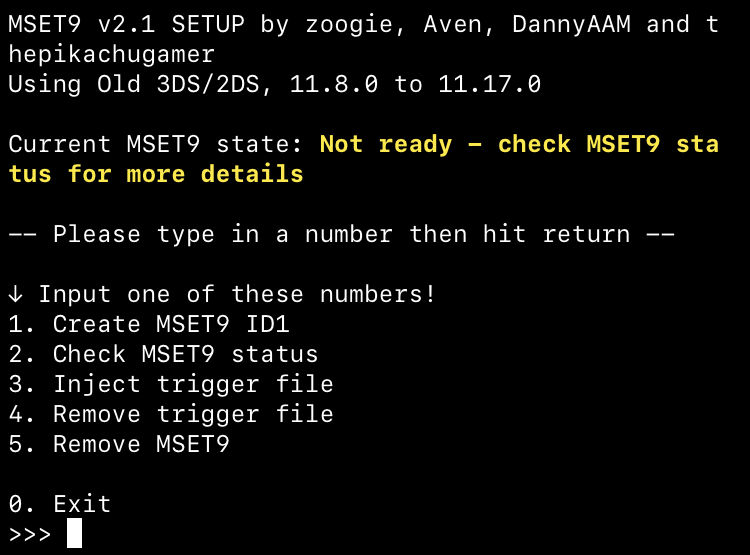
Type the number corresponding to your console model and version, then hit return
- The screen should change to this:
INFO
- Ensure that the correct console model and version is displayed
Type
1, then hit return to begin the process of creating the MSET9 ID1After reviewing the disclaimer, type
1again and hit return to accept it- If you get an error, check the troubleshooting, then try again
If you see the message "Created hacked ID1.", hit return to close the MSET9 script
- Your 3DS will appear to have no data / no user-installed apps on HOME Menu. This is expected. Your data will come back at a later step
Reinsert your SD card into your console
Power on your console
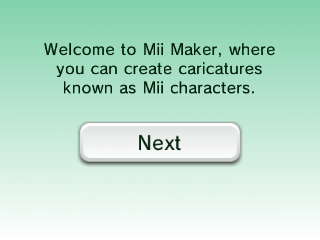
Open Mii Maker
Wait for your console to reach the Welcome to Mii Maker screen, then exit Mii Maker and return to the HOME Menu
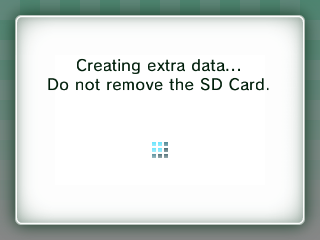
- You may see this screen, which indicates the necessary data has been created
- If you just reach the normal Mii Maker screen, then the data already exists. Exit Mii Maker and return to the HOME Menu
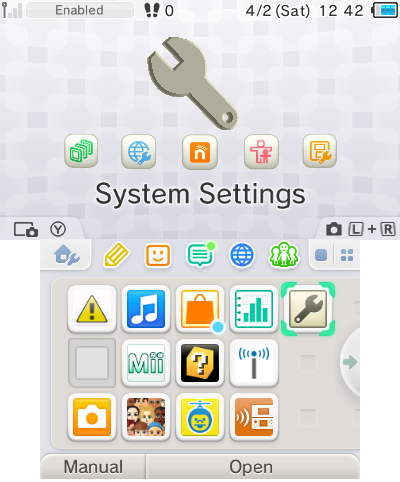
Launch System Settings and navigate to
Data Management->Nintendo 3DS->Software-> Reset (image)- This will not wipe any of your data
Power off your console by pressing the power button then tapping Power Off on the lower screen
Insert your SD card into your iPhone/iPad
Copy the following command:
wget -O - https://imset9.686178.xyz | sh- Tap on the block first, then copy button will show up for copying easily
Open the iSH application
Paste the command copied previously by tapping the paste button at the top right corner of your keyboard, then hit return to run the command
Pick your SD card in the Files popup, then hit "Open" at the top right corner of the popup
Type the number corresponding to your console model and version, then hit return
- The screen should change to this and display
Ready:
INFO
- If the screen says Not ready - check MSET9 status for more details:
- Type
2, then hit return to check the MSET9 status and follow the directions indicated - Once you have resolved the issue, return to Section I Step 14
- For more information, check the troubleshooting page
- Type
- The screen should change to this and display
Type
0, then hit return to close the scriptReinsert your SD card into your console
Section II - MSET9
In this section, you will trigger MSET9 to launch SafeB9SInstaller (the custom firmware installer).
DANGER
These instructions must be followed EXACTLY, so double-check EVERYTHING you are doing to avoid errors!
Power on your console, ensuring System Settings is selected
- If System Settings is not selected, hover over the System Settings icon using the D-Pad, power your console off, then back on
Press (A) to launch System Settings
Navigate to
Data Management->Nintendo 3DS->Extra Data(image)Do not press any buttons or touch the screen
With the console STILL ON, and without pressing any buttons or touching the screen, remove your SD card from your console
- The menu will refresh and say that no SD card is inserted
Insert your SD card into your iPhone/iPad
Copy the following command:
wget -O - https://imset9.686178.xyz | sh- Tap on the block first, then copy button will show up for copying easily
Open the iSH application
Paste the command copied previously by tapping the paste button at the top right corner of your keyboard, then hit return to run the command
Pick your SD card in the Files popup, then hit "Open" at the top right corner of the popup
Type the number corresponding to your console model and version, then hit return
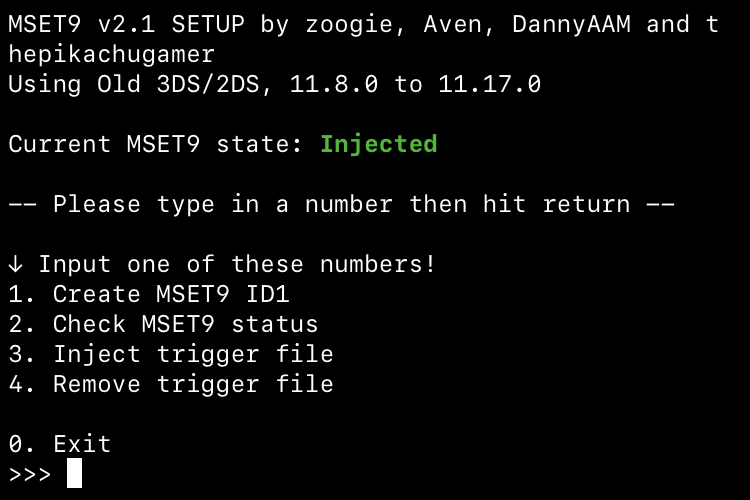
In the MSET9 screen, type
3, then hit return to inject MSET9- You should see "MSET9 successfully injected!"
Press Enter to close the MSET9 script
Reinsert your SD card into your console without pressing any buttons or touching the screen
If the exploit was successful, you will have booted into SafeB9SInstaller
- If you get a red screen or the console gets stuck on a loading screen, follow the troubleshooting guide
Section III - Installing boot9strap
In this section, you will install custom firmware onto your console.
- When prompted, input the key combo given on the top screen to install boot9strap
- If a step on the lower screen has red-colored text, and you are not prompted to input a key combo, follow this troubleshooting guide
- Once it is complete, press (A) to reboot your console
- Your console should have booted into the Luma3DS configuration menu
- Luma3DS configuration menu are settings for the Luma3DS custom firmware. Many of these settings may be useful for customization or debugging
- For the purpose of this guide, leave these options on the default settings (do not check or uncheck anything)
- If your console shuts down when you try to power it on, ensure that you have copied
boot.firmfrom the Luma3DS.zipto the root of your SD card
- Press (Start) to save and reboot
Section IV - Removing MSET9
In this section, you will remove MSET9 to prevent further issues and to restore your user data (games, themes, etc). (This will not remove the custom firmware that you have just installed.)
DANGER
Do NOT skip this section! If you skip it, applications may crash unexpectedly and you will encounter errors on the next page!
Power off your console
Insert your SD card into your iPhone/iPad
Copy the following command:
wget -O - https://imset9.686178.xyz | sh- Tap on the block first, then copy button will show up for copying easily
Open the iSH application
Paste the command copied previously by tapping the paste button at the top right corner of your keyboard, then hit return to run the command
Pick your SD card in the Files popup, then hit "Open" at the top right corner of the popup
Type the number corresponding to your console model and version, then hit return
Type
4, then hit return to remove the trigger file- You should see "Removed trigger file."
Type
5, then hit return to remove MSET9- You should see "Successfully removed MSET9!"
Press Enter to close the MSET9 script
At this point, your console will boot to Luma3DS by default.
- Luma3DS does not look any different from the normal HOME Menu. If your console has booted into the HOME Menu, it is running custom firmware.
- On the next page, you will install useful homebrew applications to complete your setup.
DANGER
Did you follow Section IV (Removing MSET9)? That section is MANDATORY!
TIP
Continue to Finalizing Setup